
Create a new admin user in WordPress
There can be a variety of reasons why you will need to manually create a Administrator Account in WordPress. From getting “Sorry, you are not allowed to access this page” on WordPress login, to a hacked user account or forgotten password. If you have access to the database you can easily recreate your user account, or create a new administrator account for your WordPress site.
If you have a very good WordPress hosting company their support will be able to do this for you, but it is always good to know how to do the hard things yourself.
Creating a new Administrator account for WordPress
You will first need to access your hosting control panel. After you have logged in, head to the database section. We will use phpMyAdmin for this demonstration. The FIRST thing we do, is make a backup of the current database. You can click on EXPORT on the top menu and export the database from there. It is very important to always make a backup first. It is much better to have a backup, and not need it, than need a backup, and not have it. Remember that, because it can be a costly lesson to learn the hard way.


Exporting the database will allow you to download a copy of it and save it on your local hard disk. It is a good idea to do this periodically anyway, so that you have a backup for your own records.
Now that you have a backup, we can proceed. Should anything go wrong, you can truncate all the tables in this database and import it again.
There is a total of three SQL queries that we will need to run to create a new WordPress Administrator user. Of course, it is also possible to do this using the ‘Insert’ menu in phpMyAdmin.
- Get the user id you will use.
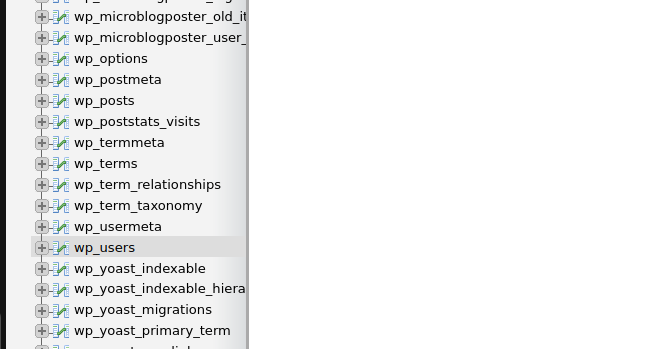
In phpMyAdmin, click on the wp_users on the left. It will list the registered users on the WordPress site. What we are after, is the last registered user’s ID, as our new Administrator user’s ID will be the next one after that.
- Variables we will use in the SQL query.
Our first SQL query has some variables that will need to be changed based on your database name, table prefix and user ID.
We will create a user named Bob, with email bob@sleuth.one.
The variables in the SQL query we will run are as follows:ID: pick a unique number (in our example, we’ll use 3)user_login: the username that will be used when logging inuser_pass: add a password, and make sure to select MD5 in the function menu (see the screenshot below)user_nicename: the user’s full name or nicknameuser_email: the user’s email addressuser_url: your website addressuser_registered: select the date and time the user was registered using the calendaruser_activation_key: leave blankuser_status: set this to 0display_name: the user’s full name or display name
We will insert this directly into the database, and for this we will need the database name and of course the tables we are inserting this information into.
For the sake of this tutorial, our database name will simply be dbname_01 while the tables are the standard wp_users and wp_usermeta. Your database name will be different, and your database table prefix might not be ‘wp_’ so make sure before you start. - Run the first query
In the top menu, click on SQL. On the next screen it will show you a box where you can run the SQL query. Our first query will look like this:
INSERT INTO dbname_01.wp_users(ID,user_login,user_pass,user_nicename,user_email,user_url,user_registered,user_activation_key,user_status,display_name) VALUES (‘3’, ‘bob’, MD5(‘Bob@password01’), ‘Bob’, ‘bob@sleuth.one’, ‘https://www.sleuth.one/’, ‘2022-09-01 00:00:00’, ”, ‘0’, ‘Bob’);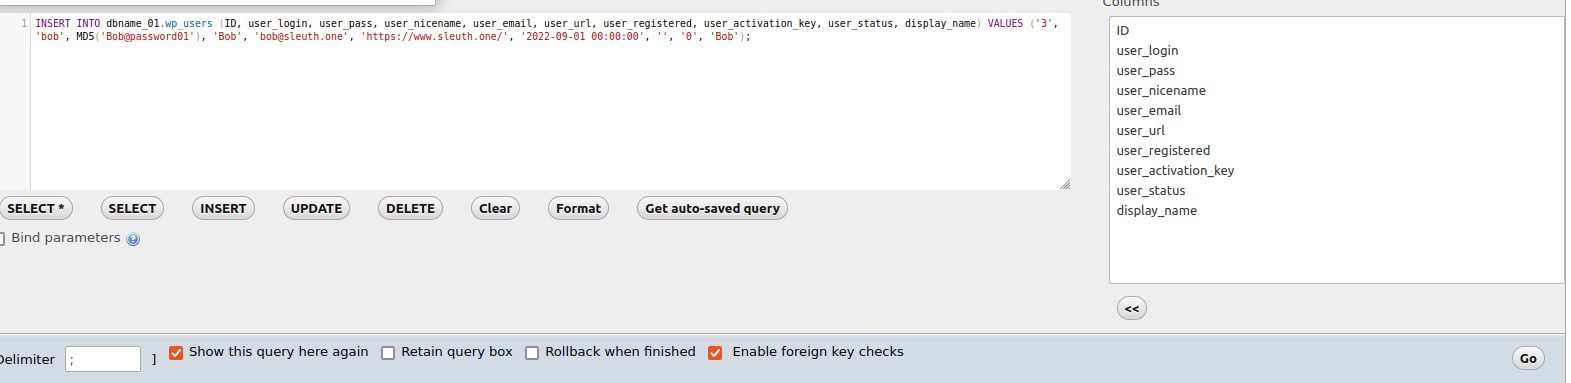
Click on Go. - Run the second query
This SQL query adds meta data for this user into the database.
INSERT INTO INSERT INTO dbname_01.wp_usermeta(umeta_id,user_id,meta_key,meta_value) VALUES (NULL, ‘3’, ‘wp_capabilities’, ‘a:1:{s:13:”administrator”;s:1:”1″;}’); - Run the third SQL query
This step adds the last needed metadata into the database for the new user.
INSERT INTO INSERT INTO dbname_01.w_usermeta(umeta_id,user_id,meta_key,meta_value) VALUES (NULL, ‘3’, ‘wp_user_level’, ’10’);
This is all you need to add a new administrator account to WordPress using phpMyAdmin. As you can see, not all is lost if you’re locked out of your admin dashboard. We hope this will help you get out of trouble should you ever be locked out of your WordPress website for any reason.